Building Envelope Inspection: A Guide for BC Residential Builders
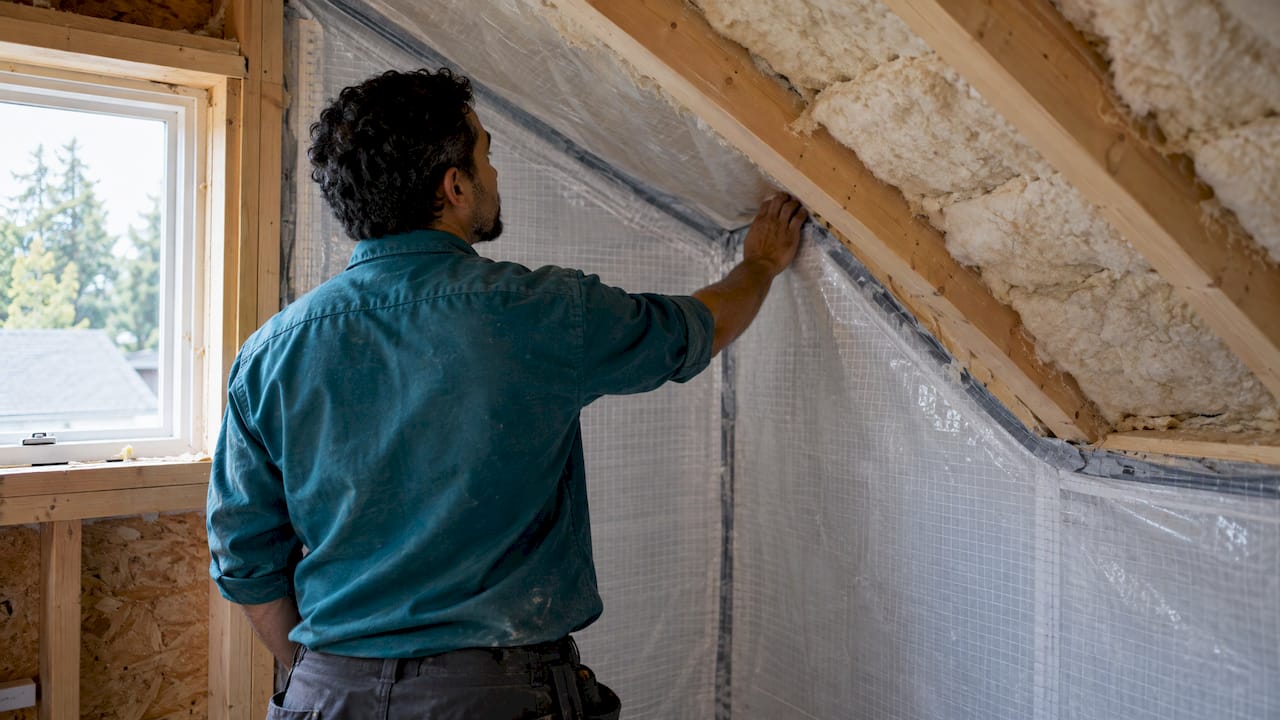
A building envelope inspection is a systematic check of the shell that separates a building’s interior from the weather: foundation walls, above-grade walls, roof, windows and doors, and every joint and penetration between them. For a residential builder in British Columbia, it is how you confirm that water, air, heat and vapour are being controlled the way the design and the BC Building Code intend. This guide explains what an inspection covers, how it is carried out, what the code expects, and what to look for on your own sites.
TL;DR
- The envelope is the foundation, above-grade walls, roof, windows and doors, and the details where they meet. Its job is to control heat, air and moisture.
- An inspection or condition assessment starts with drawings and records, then moves to on-site checks, moisture and thermal readings, and a written report with priorities.
- In BC, rain deflection and drainage come first in envelope design, and wall framing must be dry before it is enclosed.
- Flashings, air barrier continuity and window and door seals are the most common trouble spots in the research we reviewed.
- Our BC Housing approved CPD courses include a building science course, delivered as online self-paced video lessons.
Table of Contents
- What the building envelope includes
- What a building envelope inspection involves
- What a good report contains
- BC Building Code points to know
- Design principles an inspector checks against
- Common deficiencies to look for
- When to bring in a specialist
- Build the knowledge behind the inspection
- Our perspective
- FAQ
- Sources
What the building envelope includes
Natural Resources Canada describes the envelope as the shell of the house: the basement or crawl space walls and floor, the above-grade walls, the roof, and the windows and doors. It separates the indoor environment from the outdoors and has to control the flow of heat, air and moisture.
The ASHRAE terminology entry defines the envelope as the outer elements of a building, including walls, windows, doors, roofs and floors, with those in contact with the earth included. It also separates the exterior envelope from the semi-exterior envelope, which divides conditioned space from unconditioned space such as an unheated garage or attic.
The parts people forget are the small ones. The UC Davis energy audit programme lists fenestrations and penetrations as part of the envelope: skylights, electrical boxes, conduit, pipes, light fixtures and wiring that pass through the shell. Each one is a place where a layer is interrupted, and an inspector will look at each.

The layers inside a wall
The AIA/MBA Joint Committee notes that most components can be read from inside to outside using the mnemonic SPAIGR: Structure, Panel, Air Barrier, Insulation, Gap and Rain Screen. It is American guidance, but the layering logic applies to a BC wall too. When you inspect, you are checking that each layer is present, continuous and lapped correctly, and that nothing was left out or installed backwards.
What a building envelope inspection involves
The terms “inspection”, “condition assessment” and “condition survey” overlap. In practice, the difference is depth and purpose. A quick walk-around looks for visible defects. A full condition assessment evaluates how each system is performing and what shape it is in.
The purpose shapes the method. Engineering guidance from Gale Associates makes the point that the intent matters: finding one isolated leak, understanding overall condition, listing repairs, or planning long-term maintenance each call for a different approach and focus. Decide which of these you need before anyone climbs a ladder.
Typical sequence
- Document review. Architectural drawings, structural plans, and maintenance and repair records are reviewed first.
- Walk-through. Site data is collected and areas of concern are noted.
- Interior checks. Look for dampness, moisture damage, leakage and draughts, starting inside and working outward.
- Exterior checks. Walls, roofs, flashings, membranes, sealants and window and door perimeters.
- Testing. Moisture readings, thermal imaging and air leakage checks where the scope calls for them.
- Report. Findings, photographs, causes and a prioritized list of repairs.
That sequence follows the common approach described by envelope assessment practitioners in Canada, and it matches how the other sources we reviewed describe the work.
On-site checks, element by element
Interior. Look for staining, soft or bubbling finishes, musty smells and cold draughts, especially at corners, window heads and below roof lines.
Windows and doors. Check weatherstripping, glazing sealants, hardware and the perimeter seal. Dampness or a musty smell at a window often points to a leak path above or around it.
Walls. Look at cladding condition, sealant joints, transitions between materials and wall penetrations.
Roof. Check flashings and membranes for water-tightness, and look at drainage, since roof-to-wall junctions are a repeat source of leaks.
Testing methods you will see in a report
Condition assessments commonly use moisture mapping, spray-nozzle water testing, thermographic scanning and infrared imaging. Air leakage can be located with smoke pencils. The BOMA BEST Field Guide, written for commercial and institutional buildings, requires that thermal imaging and air tightness testing cover all roof and wall components and identify areas of higher-than-normal thermal transfer. A small house will not usually need that full scope, but the methods are the same.
Sometimes a test cut is needed to see what is actually behind the cladding. Plan for that in the scope and the repair budget, so the opening is closed and sealed properly.
What a good report contains
A useful report does more than list damage. It explains patterns and causes, and it ranks the work so you know what to fix first.
- A list of envelope components with their condition
- A summary of performance in terms of water infiltration, condensation, air movement and heat transfer
- Photographs and locations for each finding
- Likely sources of water entry
- Recommended repairs with priorities and timelines
- Expected service life for roofing, cladding, sealants and windows
The BOMA guide splits recommendations into tactical items, needing attention within five years, and strategic items, which are looked at after five years and typically go into a 10-year capital plan. It also asks for replacement dates on components that will need replacing within 10 years. That tactical and strategic split is a practical way to organize any envelope report, including one for a single-family home.
A real example of scale
The City of Port Moody published a building envelope condition assessment of the Kyle Centre, a complex completed around 1978. It found wall cladding in poor condition, most roof assemblies beyond their expected service life, skylights with active water ingress, and windows at end of life. The estimated cost of recommended repairs in a single-phase scenario was $2,308,000. It is a civic building, not a house, but it shows what happens when envelope components age without a plan: the work arrives all at once.
BC Building Code points to know
BC’s climate puts water management first. The Notes to Part 5 of the BC Building Code (as published in the Vancouver Building Bylaw 2019) say that in a maritime climate the first consideration should be deflecting rain with elements such as roof overhangs and flashings with drip edges. Next comes draining any water that gets behind the cladding. Drying should be considered but not relied on as the primary mechanism.
The same notes set out several points that matter on site:
- Wood framing, structural members and sheathing should not exceed 19% moisture content before the wall assembly is enclosed, and all other materials should be dry.
- Construction documents should show envelope details clearly, using progressive three-dimensional details to illustrate correct layering and overlapping.
- Where a Building Envelope Professional is required, that professional performs design and field review to confirm the continuity of the air barrier system and the performance of the vapour barrier system.
For air barriers on houses, the provincial guide to the Climate Zone 5 to 7A requirements states that a continuous air barrier is required. Article 9.36.2.9 requires continuity across joints, between assemblies and around penetrations, and Subsection 9.25.3 sets further requirements. That guide applies to the 2012 Code, with these requirements commencing on December 19, 2014. Always confirm the code edition and any local bylaw that applies to your project and your municipality.
Design principles an inspector checks against
Inspections are easier when the design is sound. These principles come up in every report.
Deflect, then drain
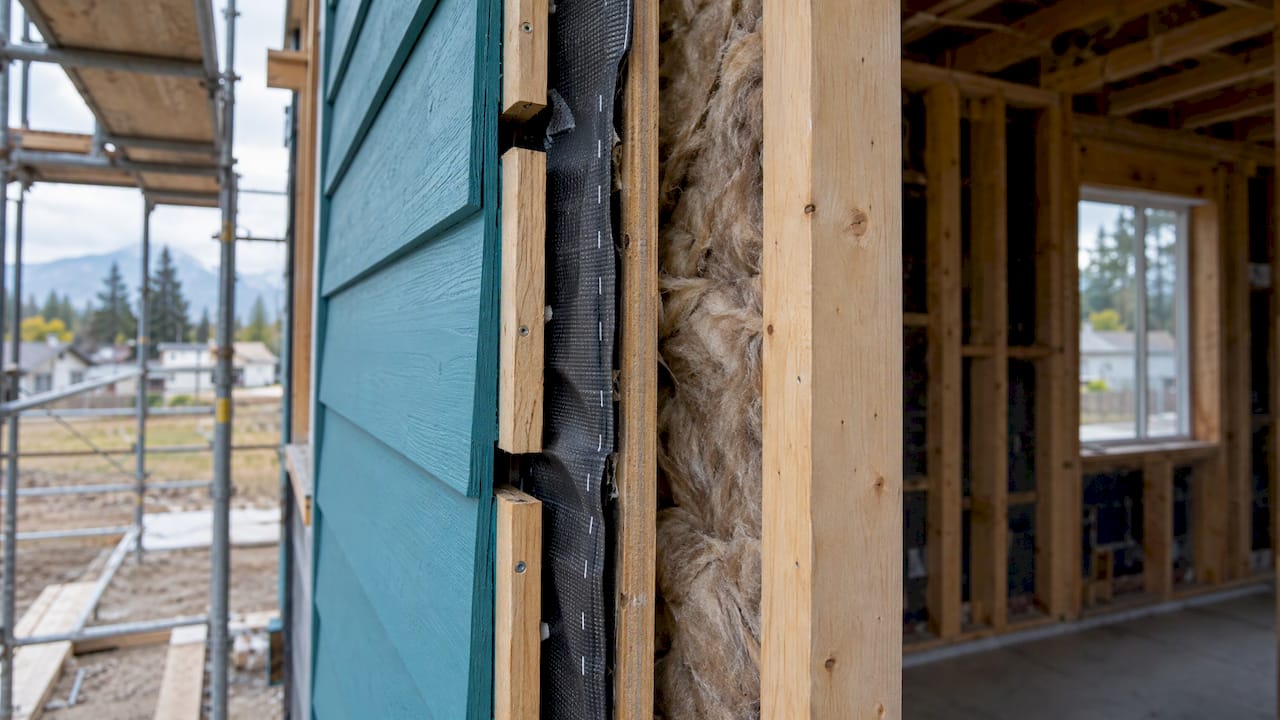
Overhangs, drip edges and properly lapped flashings keep most water from ever reaching the wall. A rain screen then gives the rest somewhere to go. The AIA/MBA Joint Committee describes a true rain screen as cladding held away from the air barrier and insulation, with an air space that allows drainage and air movement. Its purpose is to keep the weather barrier from becoming and staying wet.
Control air
The same source explains that moisture, air and vapour control reduces heat transfer, condensation, mould and water damage. The air barrier must stop air passing between the outdoors and interior, so the heating and ventilation system can control temperature, moisture and air quality more efficiently. The weak points are laps, corners, penetrations and the junction between wall and roof.
Place the vapour barrier correctly
NRCan explains that the vapour barrier resists diffusion of water vapour from inside to outside and protects insulation and structure from moisture damage. As a general rule it goes on the warm side of the insulation. New houses typically have an air barrier on the outside and a vapour barrier on the inside of the exterior walls.
Insulate continuously
Insulation slows heat loss by dividing the air space into many small pockets of still air, which limits convection and radiation across the space. Gaps, compression and thermal bridges reduce that effect, and a thermal scan will show them.
Common deficiencies to look for
The best-known Canadian study of residential envelope problems is older, but its findings are still instructive. A CMHC study of 50 Quebec residential buildings found moisture and cracking were the most frequent problems, with moisture-related problems in more than 80% of buildings. Faulty flashings were the major cause of the moisture problems. Drafts were reported in about 20% of buildings, often tied to faulty weatherstripping and seals around windows and doors.
The study’s conclusion is the one to keep. Many problems were attributed to missing or improper specifications, poor material choices, poor workmanship, and a lack of understanding of some building science principles. It recommended that builders be better informed about the role of flashings, the importance of air barriers and their construction details, and the shrinkage of wood.
A site checklist
| Area | What to check | Why it matters |
|---|---|---|
| Flashings | Laps shed water outward; drip edges present; sealed at ends | Faulty flashings were the main cause of moisture problems in the CMHC study |
| Window and door perimeters | Continuous seal to the air barrier; weatherstripping intact | Source of draughts and leaks |
| Air barrier | Continuous across joints, assemblies and penetrations | Required by the BC Building Code |
| Framing moisture | Under 19% before enclosure | Wet framing enclosed in a wall can lead to later damage |
| Roof-to-wall junctions | Membranes lapped over flashing correctly | Common water entry route |
| Penetrations | Pipes, vents, wires sealed and flashed | Each is a break in the layers |
| Cladding and rain screen | Drainage space open at the bottom; no blocked weeps | Lets water exit |
When to bring in a specialist
Some jobs call for a Building Envelope Professional. The BC Building Code assigns that role specific design and field review duties on projects where it applies. Check the code and your authority having jurisdiction to confirm whether your project requires one.
For a leak you cannot trace, a repeated moisture complaint or a building with an unknown history, a qualified envelope specialist will do invasive testing and write a report you can act on. Your own checks still matter: they catch problems while the wall is open and the fix costs the least.
Build the knowledge behind the inspection
Inspection skills come from understanding how assemblies work. Our online CPD courses for BC residential builders are approved by BC Housing for CPD credits. They are online self-paced video courses with no final exams, and you get lifetime access. Each course is $29 CAD, one-off, and live customer support is available seven days a week.

If the envelope is your concern, start with Residential Building Science for Contractors. Courses such as Construction Safety and Risk Management and Risk Management and Contingency Planning sit alongside it in the same catalogue. For more on compliance topics, visit our contractor news page.
Our perspective
Most envelope failures we hear about were not mysteries. They were details: a flashing lapped the wrong way, a window seal that did not meet the air barrier, framing enclosed before it dried. Those are knowledge problems as much as workmanship problems.
That is why we think building science belongs in every builder’s CPD plan. When you understand why a rain screen drains, why the air barrier must be continuous and why the vapour barrier sits where it does, you inspect your own work better and you brief your trades better.
Our courses are approved by BC Housing for CPD credits, and they are built for working builders. They are online self-paced video courses with no final exams, so you can learn between jobs, at your own speed, and come back to the material whenever a question comes up on site.
Chuck Pulaski
FAQ
What does a building envelope inspection cost?
Cost depends on the building size, access, testing and the depth of the report, so the quotes we reviewed give no single figure. Ask an envelope specialist for a written scope before you compare quotes. A scope that includes moisture testing and thermal imaging will cost more than a visual-only review.
Is a building envelope inspection the same as a home inspection?
No. A general home inspection is a broad visual review of the whole house. An envelope assessment looks closely at the exterior shell: how walls, roofs, windows and transitions are performing, why problems are happening, and what repairs to prioritize. It often includes moisture readings and thermal imaging.
Who should perform the inspection?
For a builder’s own quality checks, you or your site supervisor can do the visual checks above during construction. For a diagnostic assessment or where the BC Building Code calls for one, a qualified Building Envelope Professional or envelope specialist should do it. Confirm the requirement with your local building authority.
How often should an envelope be assessed?
There is no single interval for every house. The BOMA guide, written for larger buildings, uses a five-year tactical and longer-term strategic view of repairs, and asks for replacement dates on components that will need replacing within 10 years. Use that as a planning model, and reassess after major storms, renovations or any sign of moisture.
Sources
- Keeping the Heat In, Section 2: How your house works (Natural Resources Canada)
- ASHRAE Terminology: building envelope
- Building Envelope Overview (UC Davis Energy Audit)
- AIA/MBA Joint Committee: Building Envelope (2024)
- Building Envelope Assessment Steps
- BOMA BEST Field Guide: E1.2 Envelope Assessment
- City of Port Moody: Building Envelope Condition Assessment
- BC Building Code Division B, Notes to Part 5 (Vancouver Building Bylaw 2019)
- Keeping the Heat In, Chapter 2 (Natural Resources Canada)
- CMHC study of envelope problems in Quebec residential buildings (1992)